- Recommended Plugins
- Install Demo Data
- Theme Options
- Change Colors
- How To add a Social menu
- Set Shop page as Home page
- Create a full width page
- How To add categories on the Shop page
- How To change shop layout or columns
- How To add a logo image
- How To add the Top Bar
- How To change Header layouts
- How To change Blog layout
- How To create a Slider
- How To select a Fullscreen Slider
- How To change the Shop Banners
- How To change fonts
- How To create a Contact Page
- How To Add Sharing Buttons on products
- How To make a portrait product
Recommended Plugins #back to top
The theme includes plugins that you should install and activate to enable certain options.
Note: these screenshot are for demostration purpose, your theme may not need all the plugins in the screenshots. Just follow these steps and the theme will know which plugins to install.
Step 1 Right after installing the Theme you will see these next step:
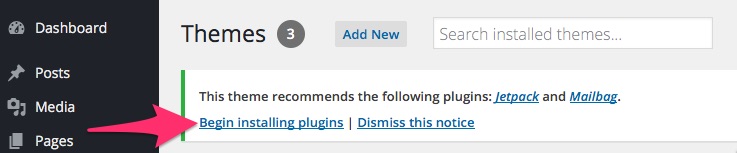
Click on Begin installing plugins
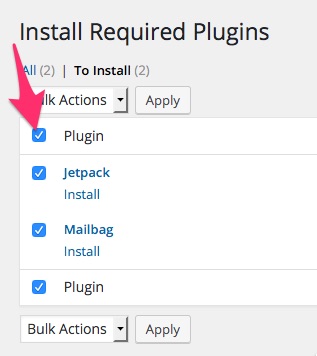
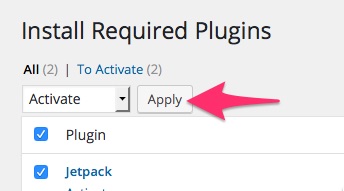
Step 2 Click like the image to select all plugins in the list:
Then select Install and click Apply
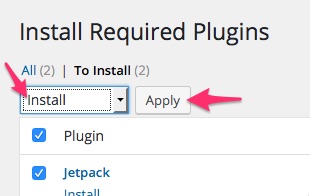
The installation process will begin.
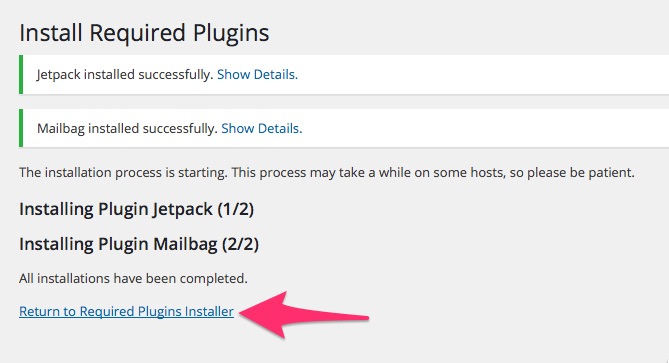
Step 3 Once all plugins are installed click on Return to Required Plugins Installer:
Step 4 All plugins are installed, now we have to activate them. Like before, select all plugins from the list, and this time click Activate:
Step 5 That’s it! Once all plugins are activated you will see this:

Demo Data #back to top
Optionally, you may install our demo data, which will populate your site with the pages you see on our live demo. This can give you a head start in setting up your site. Once you get your site setup and get the hang of it, you may delete the unwanted posts or pages as you see fit.
You can download only the XML Import File if you want or you can use the One Click Demo Install, this way with just one click you get the same site that you see on the demo.
For this, first make sure you have installed the One Click Demo Import plugin. You can follow the instructions in Recommended Plugins to install this plugin.
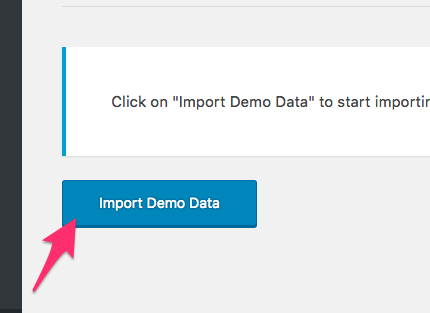
Ok, now let’s go to your Admin Panel > Appearance > Import Demo Data, there click on “Import Demo Data”:
This may take a few minutes, just wait until it says it is done.
Note: All the images were replaced with placeholders, this is to make the import process much faster and to avoid copyrights issues with the images.
Theme Options #back to top
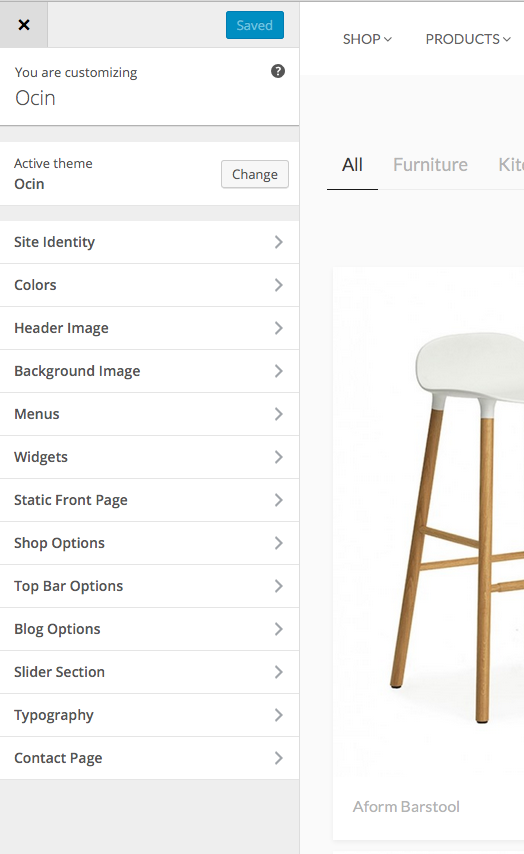
All theme’s options are in the WordPress Customizer Appearence > Customize. Here you can select things like the styling colors, change typography and much more.
Change Colors #back to top
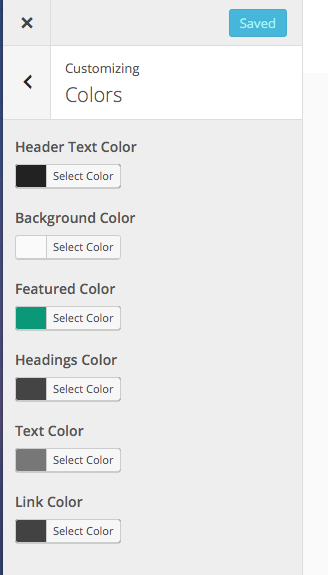
All color options are in Appearence > Customize > Colors. Select the color you want and then click on “Save & Publish”.
How To add a Social menu #back to top


Go to Appearance > Menus and create a menu with your social profiles as Custom Links.
Then select Social Menu as your Theme Location
Then you will see your social icons atomatically at the footer.
Set Shop page as Home page #back to top
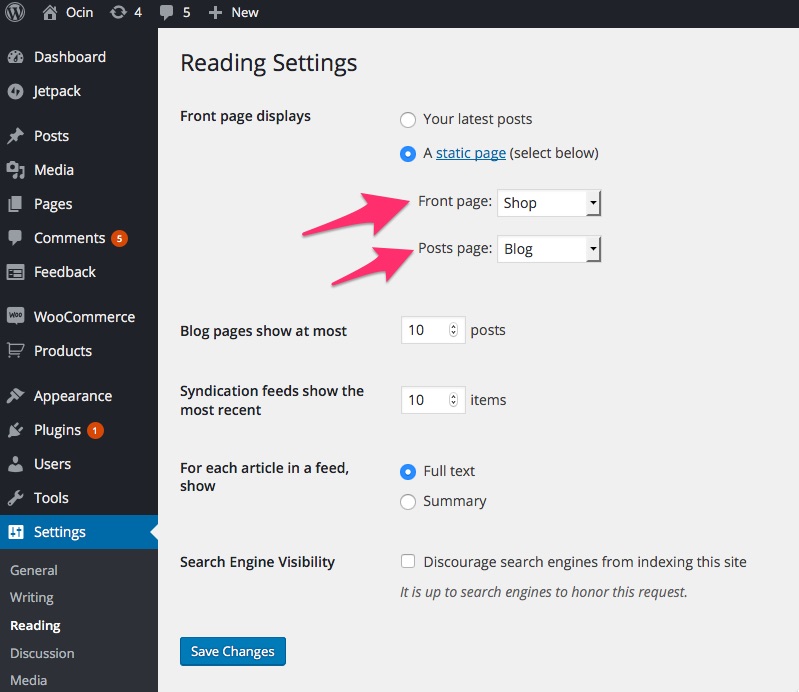
To select your Shop page as your home page, go to Settings > Reading and select them as shown in the image.
Create a full width page #back to top
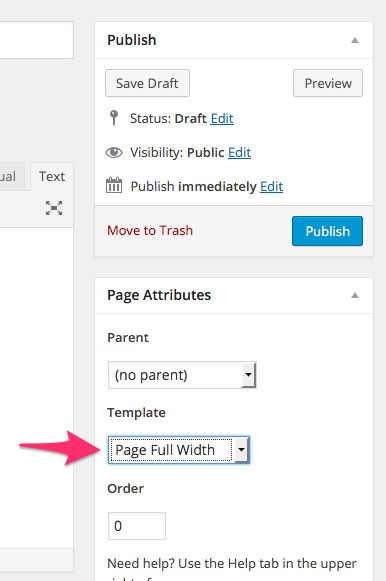
Create a full width page
If you don’t want the sidebar on a page you create. Just select “Full Width” in the Page template option.
How To add categories on the Shop page #back to top
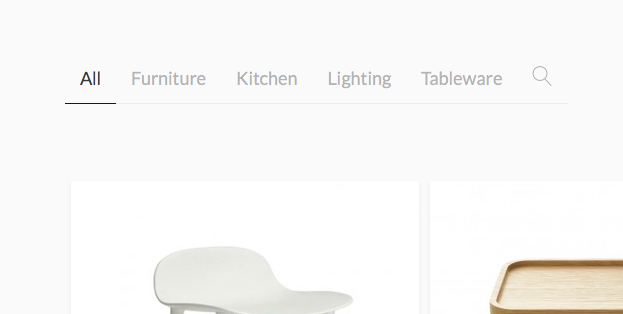
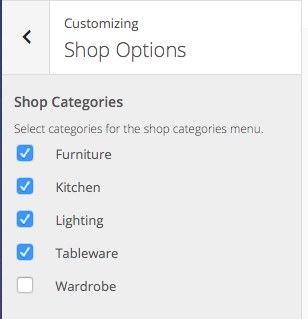
Here you can add your WooCommerce categories. Go to Appearance > Customize > Shop Options, there you can select which categories you want displayed on the Shop page.
How To change shop layout or columns #back to top
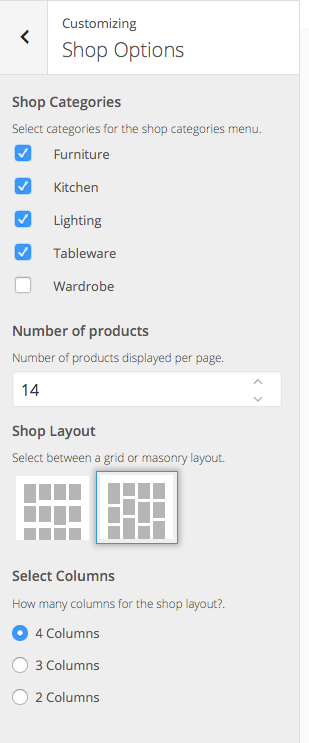
For the shop you can select two layouts, Grid and Masonry. For this, go to Appearance > Customize > Shop Options > Shop Layout.
Also you can select how many columns you want for the shop, right under Select Columns
How To add a logo image #back to top
You can easily add a logo for your site on the Customizer. For this, go to Appearance > Customize > Site Identity.
There upload your logo and click Save & Publish
How To add the Top Bar #back to top
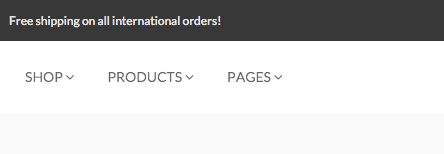
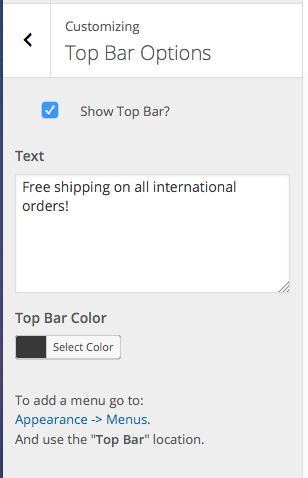
Manage your Top Bar from Appearance > Customize > Top Bar Options.
There you can enable or disable the Top Bar, add text and select the background color.
You can also add a Menu on the Top Bar. Just create a new menu and use Top Bar as your menu location.
How To change Header layouts #back to top
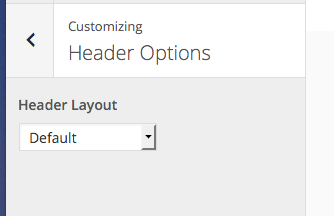
You can choose from several Header layouts, for tihs go to Appearance > Customize > Header Options.
And there select your favorite layout..
How To change Blog layout #back to top
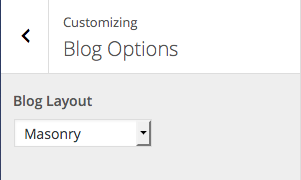
For the Blog you can select two layouts, Normal and Masonry. For this, go to Appearance > Customize > Blog Options, select your layout and click Save & Publish.
How To create a Slider #back to top
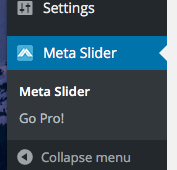
To create a slider, first, you have to install the Meta Slider plugin. This plugin will be recommended to install on theme’s activation. You can install it from Appearance > Install Plugins. If you don’t see that section is because all recommended plugins are installed and updated.
Yo create a new Slider go to Meta Slider on your Admin Panel.
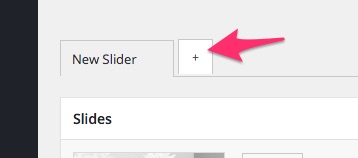
There you can start creating a new Slider by clickin on this button:
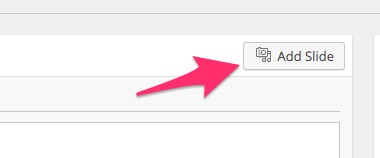
After that create your slides by clicking on this button:
Create as many slides as you want. Then you can play with the settings for the slider but these are the recommended fro the theme:
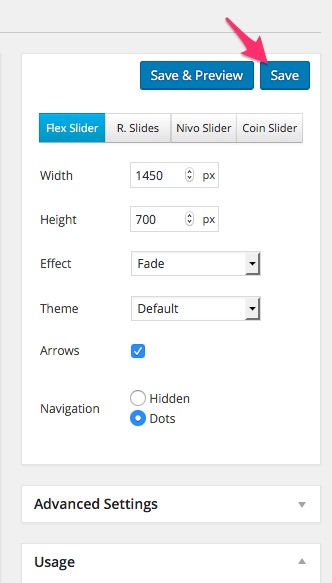
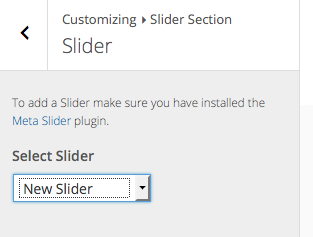
Once you have one or more slider created is time to select the one to show it on the Shop page. For this go to Appearance > Customize > Slider Section > Slider. There you will see the list of your sliders, just select the one you want and click Save & Publish.
You can find more documentation on how to use the MetaSlider plugin, here: MetaSlider Documentation
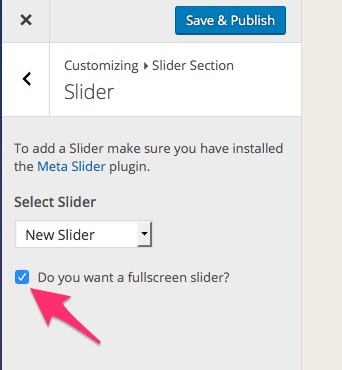
How To select a Fullscreen Slider #back to top
You can select between two slider layouts, the boxed default one or a fullscreen option.
For this just go to your Appearance > Customize > Slider Section > Slider and click on “Do you want a fullscreen slider? “
How To change the Shop Banners #back to top
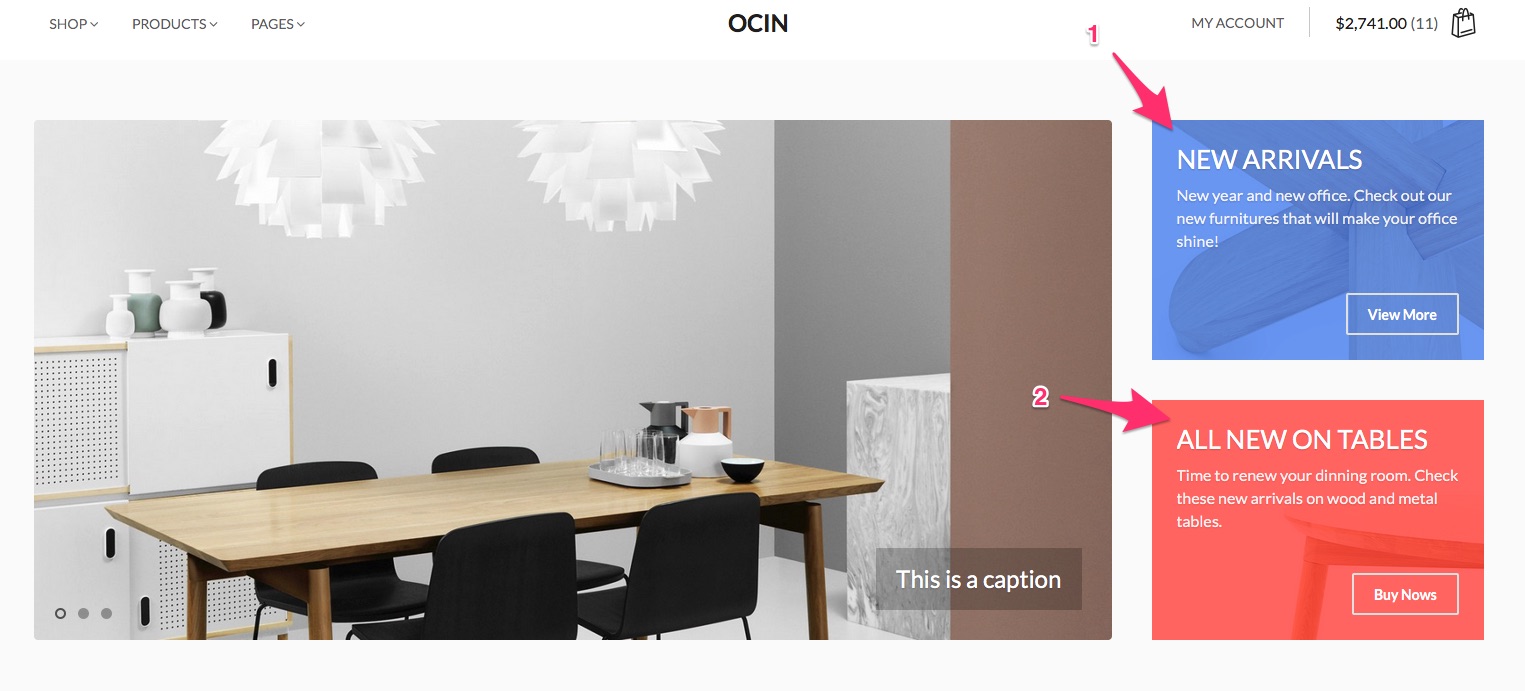

The banners are shown if you use a Slider, then you can edit them on Appearance > Customize > Slider Section > Banner 1/2
Each banner has their own options and you can have one or both enabled.
How To change fonts #back to top
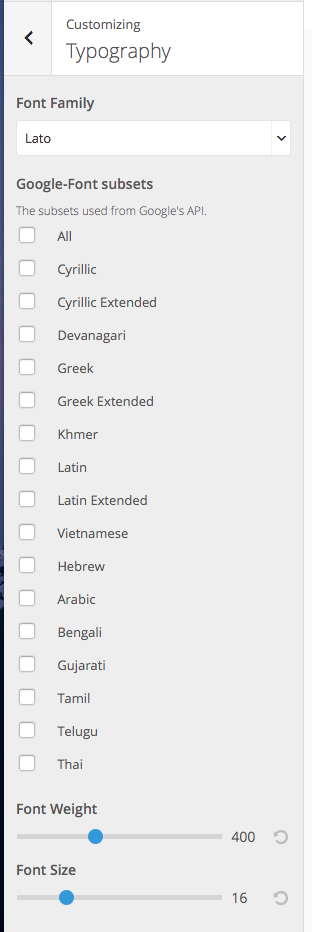
Go to Appearance > Customize > Typography to change the main font for any other Google Font listed. You can also add Google Font Subsets and change the weight and size.
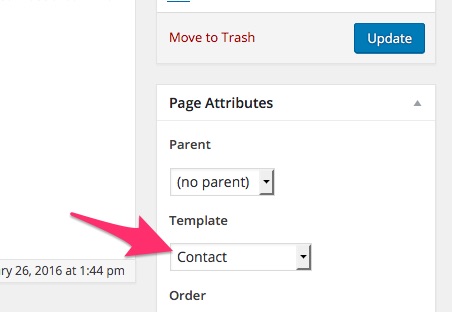
How To create a Contact Page #back to top
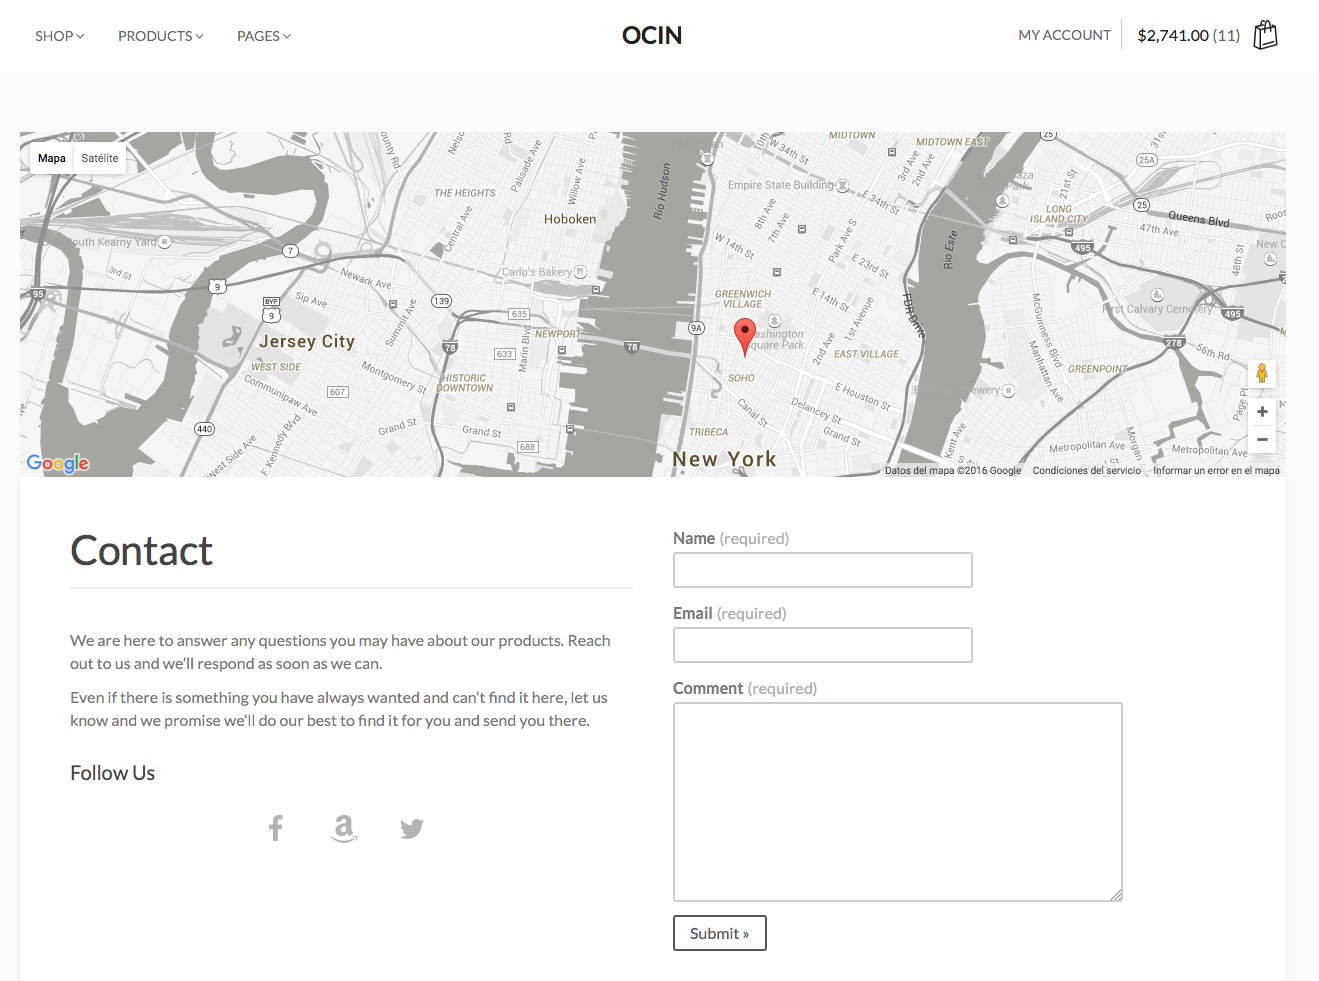
To create a contact page, start creating a new page and using the Contact page template:
This page will automatically add your Social Menu and the content of the page itself.
To add a Form, make sure you have Jetpack installed and Contact Form setting enabled, you can check this on your Admin Panel Jetpack > Settings:
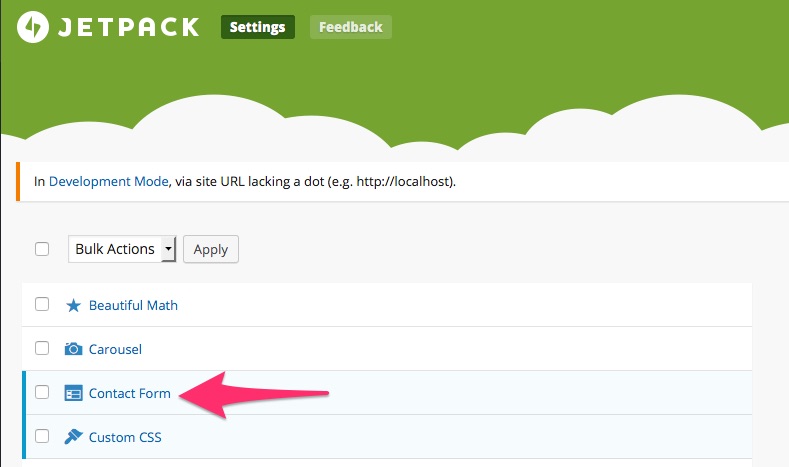
Once that’s enabled, the contact form will be automatically added into the Contact Page.
You can also add a Google Map, for this go to Appearance > Customize > Contact Page and add your Google Maps API Key and your coordinates
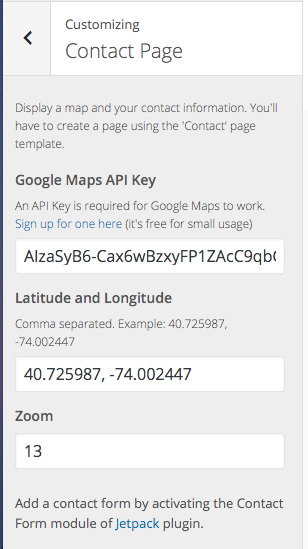
That’s it, after this you should have a Contact Page like the demo site.
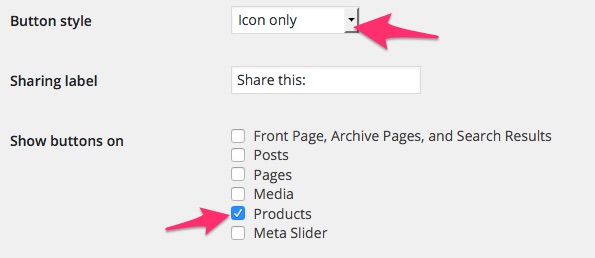
How To Add Sharing Buttons on products #back to top
The theme uses the sharing module of Jetpack to add social sharing buttons on your products.
Make sure you have the Sharing module enable on Jetpack > Settings
Then go to Settings > Sharing and select these option for the buttons to appear on your products correctly:
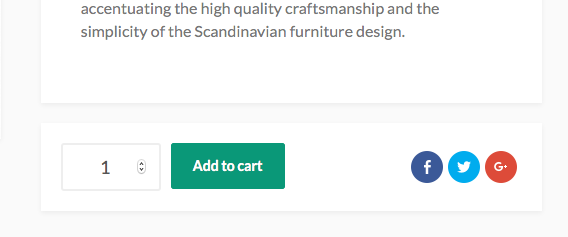
How To make a portrait product #back to top
You have the option to display products in portrait instead of landscape layout.
For this, while your are editing your product, go to the General tab in your Product Data and select this option:
